1. Forearm size
Nail Bending involves a great deal of tension in the hands, wrists and forearms which leads to major forearm muscle development, especially in the extensors of the forearm. Often, forearm work at the gym involves movements like wrist curls and other simple variations. While these exercises bring about results, many times there is a lack of development in the muscles in the back of the forearm. The sustained tension of nail bending causes growth in both the flexor side of the forearm and the extensor side of the forearm, creating an impressive look of balance and control. The top nail benders' forearms resemble the forearms of the top arm wrestlers - marked by thick, rugged and cord-like musculature.
2. Mental and Physical Toughness
Nail bending involves taking a perfectly good nail and twisting it into a shape that makes it completely useless for any of its normal industrial applications. You're doing something that was never meant to be done, and to do this requires you to focus all of your strength and your mental power into the bend. A lack of commitment from either end of the spectrum will end up in your inability to finish up the bend. When you become proficient in harnessing your mind's and your body's power in nail bending, imagine the results you will see in your other lifts or in the sport you play. You'll be unstoppable!
3. Coordination of the Kinetic Chain
Nail bending isn't just an exercise of the lower arms. If you try to bend a nail by tensing only the hands, wrists and forearms, you stand the chance of failing miserably. The best nail benders are able to coordinate the effort of the entire core and torso and radiate this exertion throughout the kinetic chain - from the core, through the torso, into the shoulders and down through their arms, forearms and hands. As I have said many times, you don't bend nails with your hands, you bend them with your entire upper body! This coordination of the kinetic chain will carry over to other lifts, even the bench press, which when done correctly involves major synchronization between all of the musculature in the upper body.
4. Sporting Implement Power and Control
Many sports involve some sort of stick, bat or other implement: baseball, racquetball, tennis, hockey, lacrosse, etc. The strength built from nail bending will translate very well into these sports. You will notice an increase in power resulting in everything from longer drives on the golf course to a stronger back hand on the tennis court. Being selective at the plate will be easier because you'll be able to pull that bat back when you realize that curveball is headed for the dirt, and your slap shots will scare all the goalies you run into on the ice.
5. Impress Your Friends
Nail bending is NOT some form of trickery or slight of hand like magic is. However, it DOES bring about much the same reaction from a crowd. Imagine talking about this new sort of strength training you are doing and when they ask you to show them, you bust out a nail, wrap it in a towel and bend it right before their eyes. How impressive will that be!
6. Get Your Name "Up in Lights"
Nail bending has been growing in popularity exponentially in the last 5 years. There are now two separate certification systems for nail bending. The first to come in existence is the IronMind Red Nail Roster, located HERE.
IronMind, Inc. is one of the pioneers in grip strength products and they offer a variety of nails that athletes can purchase and bend. These "nails" are actually a variety of lengths and diameters of cold rolled steel stock. Their biggest piece is what the call the Red Nail, a 7-inch long, 5/16-inch thick piece of evil. If you bend it using IronMind's wraps into a U-shape in less than a minute, you get your name featured on their certification list. If you click on the link, you'll see that I certified in 2007.
The other major nail bending certification is organized by John Beatty's Fat Bastard Barbell Company.
They feature a host of lists for which one can certify. Their equivalent to the Red Nail is the Bastard Nail. Bend their 7-inch by 5/16-inch stock and you garner the title of Certified Bastard! And that is just the beginning. They also feature lists for bending stainless steel stock (Shiny Bastard) and Hexagonal Stock (Hexabastard) among others!
7. Fun
The best thing about nail bending is that it is good pure fun. You are able to test yourself and see improvement in your technique and strength while seeing increases in confidence and mental edge. You can crank up the music and go for a new personal best. Over the course of time, all of the nails, bolts, and stock you bend can be saved for posterity. You can see how you progressed over the years. One day, you'll be able to tell your grand kids about when you first dominated the 60-penny nail or the grade-5 bolt. And maybe you can even log them onto IronMind.com or FatBastardBarbellCo.com and show them the certifications you were able to acquire.
In short, nail bending is one of the most exciting parts of the sport of Grip Strength. For me, the physical and the mental benefits I have seen from nail bending are outstanding, not to mention the friendships I have made with some of the top nail benders in the United States and around the world. I encourage you to try your hand at nail bending.
Read up on Nail Bending more here at Straight to the Bar and these other excellent resources:
Diesel Nail Bending eBook - The most complete bending reference on the net.
DieselCrew.com - Our site is loaded with information on Nail Bending and Grip Strength
Gripboard.com - This is THE message board for info on anything related to Grip Strength
My Blog - Stay up to date on the goings-on around the Grip World at my Blog.
NAPALM JEDD JOHNSON
 If you're looking for a little more of a grip challenge than an Olympic bar affords, consider either making or purchasing a fat bar. A typical diameter of a fat bar is 2.5' - 3'.
 If you've
 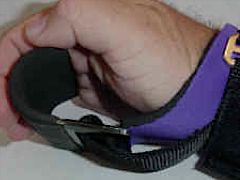 Other hooks sometimes used in conjunction with the bar are those which are connected to wrist straps (the
  For dumbbell pressing exercises when a spotter is not present, Dumbbell Hooks (usually
 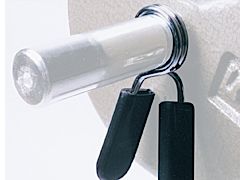 Spring collars : I use these for light weights only. They're quick to affix/release, but they tend to move a little when there are heavier weights involved.
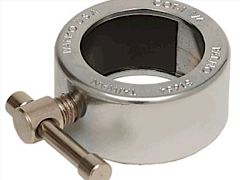 Key or pin lock (aka shaft or compression collar) :
 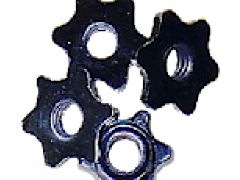 Screw thread (such as the Spinlock collar) : designed for the threaded Standard bar, these collars are simply spun into position. Whilst secure enough, their one drawback is the relatively slow changeover speed.
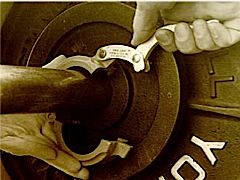 Lever locking (such as the
  Thomas Inch (1881 - 1963) was a Strongman, Bodybuilder and Circus Performer in the early 20th century. In addition to his time with the iron, he wrote a number of superb books and articles; and is often credited with the introduction of plate-loading barbells and dumbbells to the general public.
 Thomas Inch (1881 - 1963) was a Strongman, Bodybuilder and Circus Performer in the early 20th century. In addition to his time with the iron, he wrote a number of superb books and articles; and is often credited with the introduction of plate-loading barbells and dumbbells to the general public.