Fantastic explanation Joe.
1
A Quick Invitation : One of the first strength-training tools I can remember seeing my dad use was a pair of hand grippers, purchased from a local sporting-goods store. Fantastic things.
We've talked a lot about grip training over the years - everything from DIY Grip Tools to Pinch Grip Training. Love it.
 I've been involved in some aspect of sports and fitness for almost my entire life - baseball, soccer, boxing and ultimately strength sports and I have always been a huge proponent of sport/activity specific training in order to achieve the best results. If I wanted to improve my fielding I took ground balls; improving my footwork for soccer meant dribbling drills and upping my deadlift max meant - you guessed it, more deadlifting. Of course there were always supplemental movements incorporated into any stage of my training, but for the most part that's how I treated them - as supplements to the most important movement(s).
When my focus on training took a turn just under a year ago to grip and old school feats of strength I initially assumed that my training would take the same course as it always had. I would focus on a goal and perform the core movements required to get better at and achieve that goal. Well any of you out there who specifically train with focus on these particular feats probably already know that this isn't always the best course to follow regarding some feats of strength.
 Soon the holidays will be upon us and many of us will be traveling to be with family and friends. This can be a "dangerous" time for many because our training routine will be interrupted and replaced with all the caloric and sedentary temptations the holidays bring.
How can you still stay engaged in your training and yet not miss a beat? It is unlikely you can bring your kettlebells and certainly not your barbell and bumpers on your trip! In fact, now the airlines are charging for checked-in baggage, so that compounds the problem and streamlining for travel is now more important than ever. If you are runner you're set; all you need are your workout clothes and shoes. But for the rest of use who train hard with resistance exercises, I would like to offer up a few simple ideas.
 Within the community and sport of Grip Strength, the knowledge base continues to grow and the variety of training techniques are always expanding. With this article, I will tell you a little bit about the history of gripper chokers and how to use chokers to your advantage in your Gripper training.
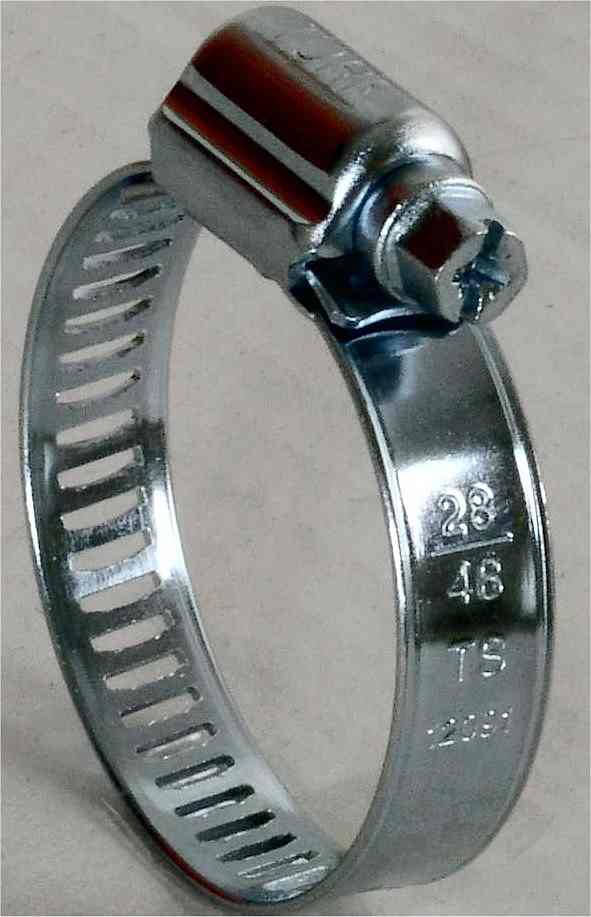
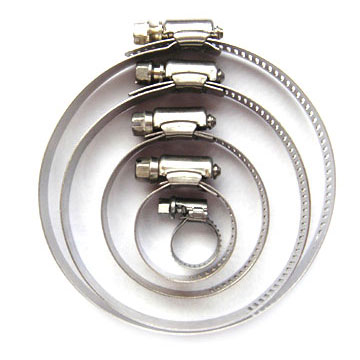 After some time, I found out that athletes were using hose clamps to tighten down the handles of their Grippers. As you can see, hose clamps com in many sizes. It is important to get the correct size of hose clamp for your grippers, though. A hose clamp that is too small will not spread across the gripper far enough for it to be useful, and a hose clamp that is too big will not tighten far enough to secure the handles. In my training, I prefer to use a hose clamp labeled for 2-inches to 2 ¾-inches diameter. These fit over the handle well and will tighten down just right for a parallel handle choked gripper attempts or wider.
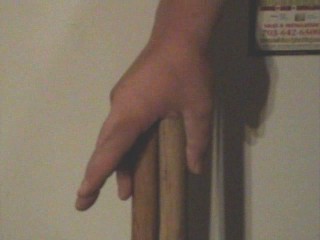
 In The Grip Master's Manual, a book I think anyone interested in grip strength should read, John Brookfield mentions that one of the secrets to closing heavy grippers, especially the IronMind Captains of Crush grippers, is strength in the last two fingers, or the ring and pinky fingers. He says that strength in these two fingers is what finishes off the close when making a big attempt. I fully agree.
 There's a very interesting discussion over at Anvil or Hammer on Mike's current grip workout, and grip workouts in general. If you're into pinching, squeezing, rolling and stretching; head over there and share your thoughts.
 Up until now, we have covered the gripper setting techniques that are most widely known in Grip Sports. While these sets allow for the athlete to pre-position the gripper before making the attempt to close the handles together, there are some other techniques that are practiced in which a pre-closing of the gripper is not permitted. These methods are called "no-sets".

 The No-Set technique is very easy to perform. All you really have to do is place the gripper in your hand how you want it, without pre-closing it, and give it a squeeze. The object is, of course, to close the gripper and touch the handles together, but upon trying this technique you will see that it is much harder to pull off because you have not pre-arranged the gripper into a position of optimal leverage. Instead, you have to work the handles the entire way through the range of the sweep.


 The table no-set is even more difficult, in my opinion, than the fundamental no-set gripper close. Again with this technique the close will not be assisted by the off-hand. In fact, with this technique only the squeezing hand is allowed to touch the gripper.
 In case you haven't seen my previous instalments in this series, let's recap.
Results tagged “grippers”
Strong hands are a huge part of effective strength training - how do you expect to pull a monster weight off of the floor if you can't hang onto the bar? Having strong hands goes beyond just performance in the gym though - a powerful grip is essential for sports performance (baseball, golf, grappling, etc) and can improve performance in a wide variety of jobs. In fact, the ability to grab hold of someone or something and maintain control can mean the difference between safety and serious injury or even life and death for those who work in law enforcement.
I am a huge fan of all types of grip training equipment - I have and regularly use Ironmind hand grippers, David Horne's Vulcan gripper, the FBBC vertical bar and Bomb as well as a variety of block weights, thick handles, bending gear, etc. And while it would be tough to get me to part with any of those implements, one of my very favorite pieces of grip training "equipment" has been in my gym bag since long before I ever invested any time in training my hands directly. I've long been a fan of taking my favorite exercises, movements that I know really work, and adding a new element to them to see if I can push the envelope when it comes to achieving results - sometimes this tactic hits, other times I realize that the original movement has become a mainstay in my routines because it doesn't need much (if any) altering.

I am a huge fan of all types of grip training equipment - I have and regularly use Ironmind hand grippers, David Horne's Vulcan gripper, the FBBC vertical bar and Bomb as well as a variety of block weights, thick handles, bending gear, etc. And while it would be tough to get me to part with any of those implements, one of my very favorite pieces of grip training "equipment" has been in my gym bag since long before I ever invested any time in training my hands directly. I've long been a fan of taking my favorite exercises, movements that I know really work, and adding a new element to them to see if I can push the envelope when it comes to achieving results - sometimes this tactic hits, other times I realize that the original movement has become a mainstay in my routines because it doesn't need much (if any) altering.
One of the most successful "add ons" I've made to my workouts to improve grip strength has been the simple addition of a gym towel (this should probably go without saying, but make sure it is a strong towel capable of holding your body weight without shredding) to certain lifts. This might sound a bit unusual, even ridiculous to some of you, but bear with me here...
The first movement I tried it with was pull ups (this certainly wasn't my innovation, I've seen many others throw a towel over a pull up bar before). I knew it would be more difficult than a conventional pull up, just didn't expect it to be that difficult. I had been training grip for a few years, primarily with grippers, but the instability/inconsistency made the pull ups far more taxing for me than traditional pull ups or what I considered to be more traditional grip training (grippers, thick bar, etc).
While adding towel pull ups as a finisher on back/arm day probably would have been enough to give a nice boost to my grip, I instinctively wanted more. What else could I throw a towel over to create a killer grip circuit?
Continue reading The Gym Bag Essential that Could Take You to the Next Level.
Perfect.

It seems as though my 'to read/watch' pile has exploded in the past week or two; although 'Napalm' Jedd Johnson's Cadence Based Gripper Training certainly made a rapid rise to the top. I have to say, it looks superb.
I'll post a full review once I finish the course (8 weeks); for the full explanation of what it's all about, over to Jedd :

A Quick Invitation : One of the first strength-training tools I can remember seeing my dad use was a pair of hand grippers, purchased from a local sporting-goods store. Fantastic things.
This week we're discussing these wonderful pieces of equipment - if you're ready to get serious about your grip work, join us for Training With Grippers II.
See you there.
We've talked a lot about grip training over the years - everything from DIY Grip Tools to Pinch Grip Training. Love it.
This week we're returning to a personal favourite, the world of hand grippers. What to get, what to do and so on. And if you've got any specific questions on your own gripper work, fire them in. We'll get through as many as we can.
Helping us explore this fascinating topic is none other than certified Mash Monster, Strongman and Personal Trainer Matt Hunt. Fantastic.
Continue reading Gymchat 181 - Training With Grippers II.
A Quick Invitation : this week we'll be talking about a key area for various types of bodybuilders, sportsmen/women and athletes in general - Arm Training. See you there.
Arm training can be a complex beast.
Considering the first exercise that comes to mind for many people is the humble bicep curl, it's a little tricky to encourage arms to gain size and strength in all the 'right' ways. The ones that help with your own goals, whether you're a professional Armwrestler, Powerlifter or Olympic Gymnast.
This week we're looking at Arm Training overall. What's involved, how it helps, and how to make sure it works for you. And if you've got any specific questions on your own arm training, fire them in. We'll get through as many as we can.
Helping us explore this fascinating topic is none other than Olympic athlete, personal trainer and nutritionist Maik Wiedenbach. Fantastic.
Continue reading Gymchat 180 - Arm Training.
I give a quick review of this AWESOME DVD by 'Napalm' Jedd Johnson. If you're looking to take your gripper training to the next level or you're just beginning, this is the one and only DVD out there you need to CRUSH anything!
Another brilliantly simple dose of DIY goodness from 'Mighty Joe' Musselwhite. Love it.
Great exercise - the Plate Curl.
When my focus on training took a turn just under a year ago to grip and old school feats of strength I initially assumed that my training would take the same course as it always had. I would focus on a goal and perform the core movements required to get better at and achieve that goal. Well any of you out there who specifically train with focus on these particular feats probably already know that this isn't always the best course to follow regarding some feats of strength.
With power lifting and bodybuilding there is and endless array of plans and formulas based on years and years of research by top performing athletes and coaches that have good track records of proven results. If you want to get a single lift, or your power lifting total, up you can try: Westside, 5 X 5's, 3 X 3's, Buckeye, Smolov, linear periodization, etc, etc, etc. You'll be able to easily find spreadsheets that you can punch your current max and your goal into and the numbers that you'll use to attain your goal will automatically be generated for you - like a road map to your success.
With some grip activities and feats of strength similar modalities of training as described above can be implemented because there is a natural progression towards the ultimate goal. Closing hand grippers is one example of this - CoC, Beef Builder, Heavy Grips etc all have low, medium, difficult (and darn near impossible) grippers that you can work your way through - knowing what your next step will be along the way.
With certain feats of strength though, it's not so cut and dried. The formulas simply don't exist, and with certain feats there is no build up to the eventual completion and very little in the way of track-able progression to tell you how close you are to actually achieving your goal. One of my recent goals was to crush a full soda can - this is one of those feats that there is no training information on, that there is no gradual progression toward and that there is no way of knowing when you're ready. Admittedly, much of my plan was founded through trial and error, but here is how I achieved that goal...
Continue reading Unusual Goals Require Unusual Measures.
Well traveled suitcase.
How can you still stay engaged in your training and yet not miss a beat? It is unlikely you can bring your kettlebells and certainly not your barbell and bumpers on your trip! In fact, now the airlines are charging for checked-in baggage, so that compounds the problem and streamlining for travel is now more important than ever. If you are runner you're set; all you need are your workout clothes and shoes. But for the rest of use who train hard with resistance exercises, I would like to offer up a few simple ideas.
Continue reading Pack Light, Train Hard.
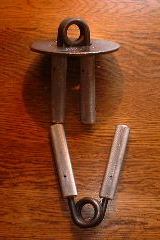
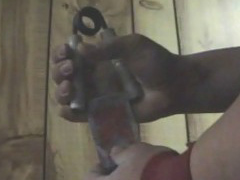
A Choked Gripper
Choker Image via PDA
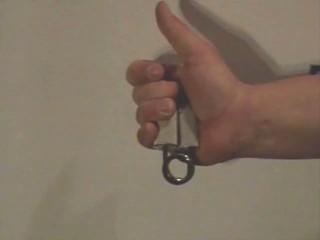
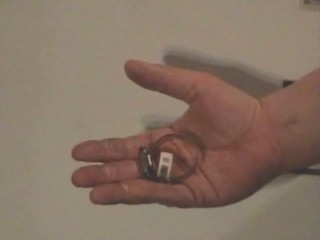
Several years ago, PDA, Piedmont Design Associates, began selling a choker plate that could be put over the spring of a gripper in order to reduce the length of the sweep between the handles. This device is called the Ironhorse Choker Close Collar and can be found on the PDA website, FractionalPlates.com. I have had one of these chokers for many years and have used it on many of my grippers. As you can see in the image, the disc is slid over the spring, reducing the spread space between the ends of the handles.
If there is one downside to this type of choker, it is because it will slide off if the gripper is tipped upside down. Inverting a gripper like this is very good for training the last two fingers, which I have written about before in a previous article here on STTB. Check it out here.
Image via Germes Online
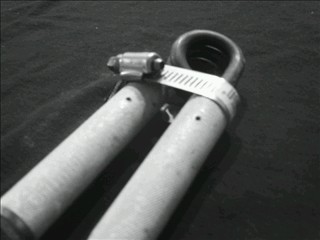
Image Via Tork Clamps Site
In recent years, Choked Grippers has become an event at several Grip Contests. The promoter tightens the clamp down on the handles of the gripper so that they are at parallel. The parallel set, or Mash Monster set, is the most common setting technique used in Grip contests, but it can be difficult for the referee to judge parallel handles during Gripper set for many reasons. The pre-closed choked set eliminates this uncertainty almost entirely.
I am currently preparing for an early-December Grip Contest, the Gripmas Carol, organized by Chris Rice in Crooksville, Ohio. In this contest, Choked Grippers at parallel is one of the events. To prepare, I have choked a handful of grippers at parallel. In my training sessions, I try for max closes with the hardest grippers I have choked. If I successfully close a gripper, I then open up the clamp just a touch and then try to close the gripper again. This has been working very well.
Continue reading Choked Gripper Training.
Another great clip from the World's Strongest Arms DVD - Magnus Samuelsson on gripper training. And yes, that's a CoC #4 he's repping with.
The Grip Master's Manual.
After analyzing my performance over the last couple of years in grip contests, I have identified grippers as one of the events I must work on. Aside from other methods I have been using to bring my crush up, I have been supplementing my normal gripper work with lots of focus on the last two fingers.
There is a multitude of ways to work the last two fingers but I want to share some of the things that I have been doing routinely to work on the last two.
One thing that I have been using is the IronMind Tug #5. The IronMind Tugs are shorter-handled torsion-spring grippers that are designed specifically with the last two fingers in mind. I will perform repetitions with the Tug #5 and holds for time, each day I do gripper work. The Tug #5 started out tough for me but after much work on it and probably due to some seasoning, it has gotten rather easy and I am considering buying the next level up in an effort to keep progressing on grippers.
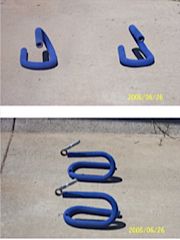
Another tactic I have implemented is called choking. Choking is where you secure the gripper handles down with an object so that they are partially closed. This can be done with a PDA choker, a large washer, or a hose clamp, which is what I use. Hose clamps cost about $1.50 at the hardware store and are a very cheap yet functional option for gripper choking.
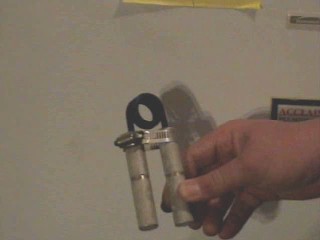 I have choked down a #1 Captains of Crush gripper to the point that the handles are parallel.
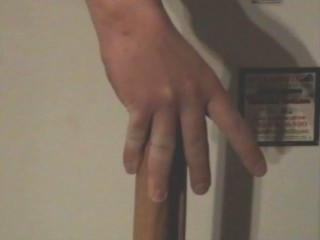
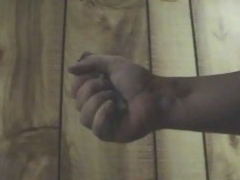
 Then, I invert it, like a Tug, and make attempts to close it with only my last two fingers. I have not yet been able to touch the handles together with my last two fingers, but I am down to about a sixteenth of an inch and if I cheat the handles shut and then remove my off hand, I can hold it nearly closed.
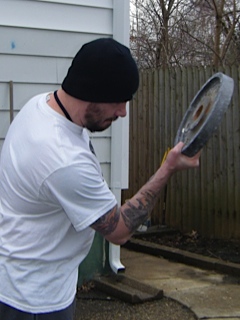
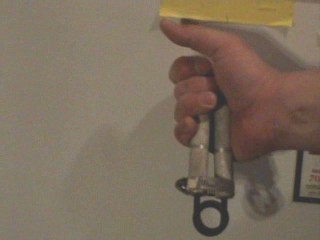
Also, I have been working my last two fingers in a static fashion by pinching together the handles of two sledgehammers.
I normally perform timed holds with this lift, but I also like to pinch and lift the sledges and then swing the handles back and forth, perform figure eights, and twists with the sledges aloft. This is a great finisher to your last two finger training.
Continue reading Last Two Finger Training.
The emails are pouring in. It seems everyone is getting excited about building their grip strength these days - and why not? It's fun and it makes sense. The stronger your hands get, the stronger the rest of your lifts will get.
I recently received an email from a fellow named Kurt who wanted some help with his Grip Training Program design. Here it is:

I recently received an email from a fellow named Kurt who wanted some help with his Grip Training Program design. Here it is:
Hey Jedd,
First off, I love the newsletter you guys send out, thanks for all your hard work. I was hoping to get some advice from a Mash Monster. I closed the #2 C.O.C a month ago and just the other day I couldn't close it. I don't what happened. Now, I do work with my hands (Electrician) so I think that might have something to do with it, but since I'm new to grip training here's my grip training work out:
#1 C.O.C 10reps 5sets
Dumbbell Hammer Curls 10sets 5-6reps 35#
Wrist curls w/ 25# Dumbbell ----> TO FAILURE
I drilled a hole in a Closet Rod, put rope through the hole, tied a knot on the Rod side and tie off weights on the other end and twist it up and down. I do this to Failure also
What do you think? I would appreciate any input you have.
Kurt, thanks for the compliments on the newsletter. You are off to a good start with your routine, but I do have some comments I'd like to make.
First off, it is very possible that the intense use of the hands at work is holding you back from significant gains in your grip training. If this is the case, you may want to ditch all of the grip training for a week or two and hit it again when you are well rested. Also, try to find ways to warm up before your shift, stretch throughout your shift, and again when your shift is done. Some sort of analgesic rub (Flexall, Jack's Blue Heat) for the hands and joints might be just what you need to keep your hands feeling good throughout the work day.
Continue reading Grip Chronicles.
Have you wondered: What is the hardest gripper? Where do my grippers lie? What grippers can I get to bridge the gap between what I am closing now and my goal gripper?
Questions such as these are why you have to join THE GRIPBOARD. Everything regarding Grip Strength has been discussed. If there is something that hasn't, then you should bring it up.

Questions such as these are why you have to join THE GRIPBOARD. Everything regarding Grip Strength has been discussed. If there is something that hasn't, then you should bring it up.
In most cases, all you have to do is use the search function and you get what you need.
Recently, a member on the Gripboard, Sultan_of_Spin, dug up a gem of a thread, originally started by Stalwart Sentinel. Within the post was the succession of Grippers from the easiest, the IronMind Guide, to the toughest, the RBWT (Robert Baraban's World's Toughest).
Here is the hierarchy according to Stalwart Sentinel's research. Take in mind that grippers with the same name can vary. For instance, due to changes made in spring material, the original Heavy Grips 300 I have is much tougher than the newer one I have. Still, even with variance in mind, this is an excellent list to base your purchases and training choices upon.
- IM Guide 60 lbs
- RB70
- IM Sport 80 lbs
- HG100
- .225 BB Beginner 100 lbs
- HG150
- .225 COC T 100 lbs
- RB130N
- RB100
- RB160N
- RB130
- RB180N
- .235 BB Advanced 140 lbs
- .235 COC #1 140 lbs
- HG200
- .241 COC 2004 #1 153 lbs
- PDA243
- .250 COC 2006 #1.5 168 lbs
- .250 BB Super Advanced 173 lbs
- GM1 cert gripper
- RB210N
- HG250
- RB160
- .260 BB Master 195 lbs
- .260 COC #2 195 lbs
- RB180
- RB240N
- PDA262
- RB260N
- .273 COC 2006 #2.5 238 lbs
- HG300
- .275 BB Super Master 255 lbs
- GM2 cert gripper
- RB210
- HG400
- .281 BB Grand Master 280lbs
- .281 COC #3 280 lbs
- .277 RB240
- .283 COC 2005 #3 290 lbs
- GM3 cert gripper
- RB300N
- HG350
- .277 RB260
- .295 spring, 1/4" mount, 2.75 width MMG1 * 306 lbs
- .295 spring, 3/16" mount, 2.75 width MMG2 * 315 lbs
- .295 BB Elite 320 lbs
- .294 COC 2006 #3.5 323 lbs
- RB330N
- .306 spring, 1/4" mount, 2.75 width MMG3 * 335 lbs
- .295 RB300
- .306 spring, 3/16" mount, 2.75 width MMG4 * 345 lbs
- .306 BB Super Elite 345 lbs
- .312 BB Grand Elite 365 lbs
- RB330
- .312 COC #4 365 lbs
- .353 HG500
- RB365
- .331 BB Pro 430 lbs
- .345 BB World Class 470 lbs
- .353? BB Galaxy 565 lbs
- .362 BB Super Galaxy
- .375 BB Grand Galaxy
- RBWT
Source: Here
Continue reading The Gripper Hierarchy.
Although there are now many grippers on the market, I still like the Captains of Crush (CoC). To take a look at some of these in action, just head over to YouTube. The clip above shows Viper repping with a #3. Not bad at all.
 Gripper Push-ups - just one of the incredibly inventive exercises from Brad Johnson. Simply affix a pair of grippers to push-up stands (pictured) and enjoy.
Grip tools.
There are plenty of great nuggets of information in there.
No-Set Close.
Within this category, there are two techniques - the basic no-set, and the table no-set.
No-Set Close
Open.
Closed.
Now, even though you do not pre-close the handles, you can still place the gripper so that it is in an advantageous position. Naturally, when you attempt a no-set close, you are not just going to haphazardly drop the gripper into your hand and hope your fingers catch it in a good spot. Instead, you should situate it, so that the anchor handle is firmly and squarely set against the thumb pad and the other is favorably in contact with the fingers. This will ensure that the gripper does not slip around in your hand while closing.
No-set closes are one of my main focuses with grippers at this time, and I can see that I progress much slower with no-sets than I do when using a set.
Table No-Set
Table No-Set Close 1.
Table No-Set Close 2.
Table No-Set Close 3.
Table No-Set Close 4.
This technique is the one that is required for certifying under the Warren Tetting regulations. You can contact Warren Tetting for a specially made gripper which you can then certify on. To qualify, the gripper must start on a table or other hard, flat surface. The athlete must reach down with the squeezing hand, grab one handle and then wriggle the fingers into position to make the close.
To the best of my knowledge, the athlete must video tape the certification attempt and send it to Warren Tetting himself. Beyond these details, I am not sure, as I have never looked into this certification, although many Gripboard members have done so.
Continue reading Straight to the Grip Contest Part V - The No-sets.
New IronMind Set.
The one-inch-set rule eventually became a problem for both the Gripboard and IronMind itself. Like we covered last time, not everyone's definition of one-inch matched. With that, the Gripboard decided to change the legal set depth to parallel, leading to the current definition of the Mash Monster set. However, the inconsistency in setting the gripper for IronMind's certification also is what spawned what is referred to as the Credit Card set.
The current IronMind set involves pre-setting a Gripper with the off-hand.
The athlete must be able to pass a credit card, ATM card, or the IronMind-provided Captains of Crush Gripper ID card through the handles width-wise.
After removing the card, the athlete can crush it home.
The Credit Card set is the ONLY technique that IronMind allows now. As mentioned before, some athletes started abusing the ability to deep set the Gripper for their certification. According to a post I saw on the news section of IronMind.com from several years ago, they wanted to bring some standardization back to the certification process. Their decision was to still allow for a set to be used, but now the athletes would be required to fit a card between the handles after pre-positioning the handles and before attempting the close. The reason for this card was to disallow an extremely deep set. IronMind also provides the athletes with a Captains of Crush Gripper ID card, that can be attached to a key chain, or worn around the wrist, by a rubber bracelet attached to the card.

This set technique has proven to slow down the certifications on the #3 Grippers quite a bit. Following the adoption of the new set rules, only 6 people were certified on the #3 in 2005 and only 3 in 2006. At this point, 2 have been certified in 2007. Click here to check out the official list of certified #3 gripper closers: Certified Captains of Crush. You'll notice right away the abrupt drop off once the new set was started.
The Credit Card set is not as popular in Grip Contests as the Mash Monster set. Many athletes dislike the technique because they would rather be able to close big Grippers when they pay money to travel to and enter a contest. Promoters also like to be able to say that their contest produced a hefty number of athletes that smashed the #3. Finally, fans of contests want to sign onto the Gripboard and read about monster Grippers getting closed when they peruse the results of a major Grip Contest. It is quite shocking when you read a Grip Contest report and you see that certified #4 Captains of Crush closers finished only marginally ahead of people who currently aren't certified for closing #3's yet! Many athletes dislike this set technique!
Continue reading Straight to the Grip Contest Part IV - Current IronMind Set.
I certified as an IronMind Captain of Crush on the #3 Gripper at the end of 2003. In 2004, the IronMind certification was still the only one that existed. In order to get your name 'up in lights,' you had to do so through the IronMind certification. Click to go to IronMind's Captains of Crush Certification page. To this day, IronMind remains the gold standard in Grip Strength equipment.
At that same time, a regular topic being discussed on the Gripboard was the fact that there was variance between the IronMind number 3 grippers. It was noted that many of the older #3's were more difficult than the ones that were currently being produced. While I have only tried a handful of older grippers, and by 'older' I mean produced prior to 2003, the ones I have tried were definitely more difficult on average. The fact is grippers do vary. To me, it seems that most of the time that I squeezed a pre-2003 #3 it seemed harder to shut that ones made after 2003. Then in 2005, it seemed to me that they didn't vary as much. These days, the #3's all seem just about the same, and you rarely find a spongy one.
Continue reading Straight to the Grip Contest Part III.