Here's a guide to fitness-related goodies for your Mother, Mommy, Ma or Mum. Even if she hasn't had time to step into rubber-soled shoes in years, there are items here that will make her smile at the thought of flexing again. And if she's as hardcore as the Straight to the Bar team, you've just hit the jackpot.
Happy Mother's Day, Grrrls!
Training, lessons, sessions and classes
What's the second-most precious thing to most mothers? Time to herself. Serve her notice that she's been signed up for one-on-one time with a great personal trainer - general fitness or specialized sport coach (boxing never fails!). Sign her up for ten yoga sessions at the groovy upscale studio you always see advertised. Or if she doesn't have a gym membership, get her a punchcard for ten guest visits, so she can use the gym whenever she wants, without the sales pitch of the trial membership. It's guilt-free time for her to focus on herself, her body and her personal quality of life.
Jogging strollers
Does she have stroller-ready children but no jogging stroller? Sure as taxes, she has jogging stroller envy whenever some perky mother and baby pair in matching designer warm-ups glide by with one. For the top picks, check out Collapsible jogging strollers that go from trunk to trail with ease. This review piece by Sarah Bowen Shea is online at Runners World. (Pictured is Shea's favored Schwinn Joyrider Jogger)
Foodies
Chocolate. You better believe grrrls want chocolate. Chocolate that won't sit in our stomachs during a work out, give us a sugar crash, make us feel fat, guilty, or like we have to brush our teeth. We're talking whole food chocolate. This mind-blowing stuff is made with just cocoa, nuts, dates, maybe a little fruit - stuff like that, and it tastes amazing. I love Labarar's delectable Jocalat bars and the similar Clif Nectar bars.
 A blender. As Krista Scott says, generally one has to tread carefully when getting household items for women for romantic occasions, but pair it with a big jug of protein powder and you should be cool. The Kitchen Aid commercial blender is the Cadillac.
 And/or a blender bottle - not the kind with a motor, but this innovative and effective low-tech one with a wire whisk-like ball inside.
Boxing Gear
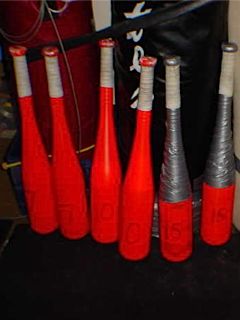
 Whether you are a grrrl, or have a sister or daughter, you know that grrls like to hit things. Give her something to beat on besides you. Any grrl will be delighted with the right bag to punch or kick. Check Title Boxing or Everlast for a variety of heavy bags, speed bags, and martial arts bags. If she's into cardio kickboxing, she's probably used to a freestanding bag with a water-filled base.
 Everlast Evergel Glove Wraps rock. She can wear them under bag gloves as a convenient and more protective alternative to handwraps, or alone for light bag work, mitts, speed bag, grappling and more.
 Then get her a real pair of G&S bag gloves, instead of those cheap ones from the sports store. Twelve ounces should be fine, and they're very helpful in figuring out fit if you call.


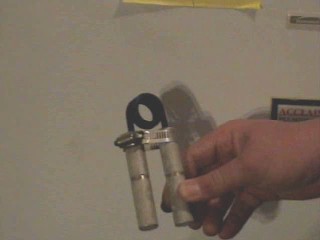 I have choked down a #1 Captains of Crush gripper to the point that the handles are parallel.
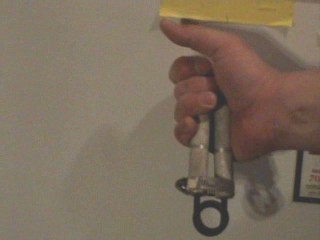 Then, I invert it, like a Tug, and make attempts to close it with only my last two fingers. I have not yet been able to touch the handles together with my last two fingers, but I am down to about a sixteenth of an inch and if I cheat the handles shut and then remove my off hand, I can hold it nearly closed.
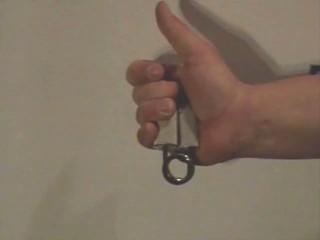
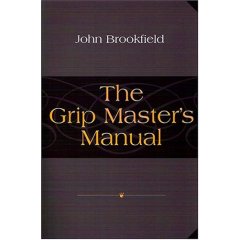 In the Grip Master’s Manual, a book I think anyone interested in grip strength should read, John Brookfield mentions that one of the secrets to closing heavy grippers, especially the IronMind Captains of Crush grippers, is strength in the last two fingers, or the ring and pinky fingers. He says that strength in these two fingers is what finishes off the close when making a big attempt. I fully agree.
 One thing that I have been using is the IronMind Tug #5. The IronMind Tugs are shorter-handled torsion-spring grippers that are designed specifically with the last two fingers in mind. I will perform repetitions with the Tug #5 and holds for time, each day I do gripper work. The Tug #5 started out tough for me but after much work on it and probably due to some seasoning, it has gotten rather easy and I am considering buying the next level up in an effort to keep progressing on grippers.
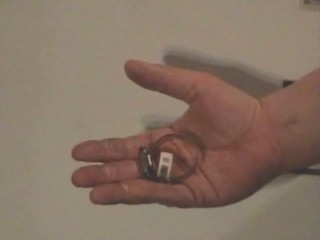
 Another tactic I have implemented is called choking. Choking is where you secure the gripper handles down with an object so that they are partially closed. This can be done with a
  I have choked down a #1 Captains of Crush gripper to the point that the handles are parallel.
  Then, I invert it, like a Tug, and make attempts to close it with only my last two fingers. I have not yet been able to touch the handles together with my last two fingers, but I am down to about a sixteenth of an inch and if I cheat the handles shut and then remove my off hand, I can hold it nearly closed.
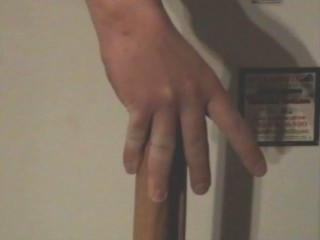
 I normally perform timed holds with this lift, but I also like to pinch and lift the sledges and then swing the handles back and forth, perform figure eights, and twists with the sledges aloft. This is a great finisher to your last two finger training.