Results matching “Bird”

This is a guest article by freakishly strong gripster Jedd 'Napalm' Johnson - Straight to the Grip Contest: Pt V.

Up until now, we have covered the gripper setting techniques that are most widely known in Grip Sports. While these sets, allow for the athlete to pre-position the gripper before making the attempt to close the handles together, there are some other techniques that are practiced in which a pre-closing of the gripper is not permitted. These methods are called "no-sets."

Within this category, there are two techniques - the basic no-set, and the table no-set.

No-Set Close
ns5.jpg
ns3.jpg
ns2.jpg
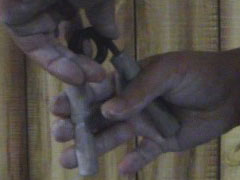
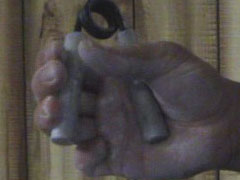
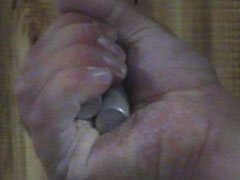
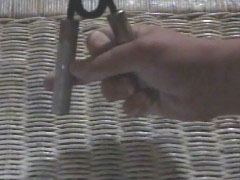
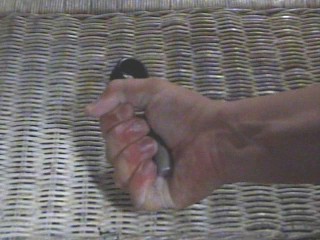
The No-Set technique is very easy to perform. All you really have to do is place the gripper in your hand how you want it, without pre-closing it, and give it a squeeze. The object is, of course, to close the gripper and touch the handles together, but upon trying this technique you will see that it is much harder to pull off because you have not pre-arranged the gripper into a position of optimal leverage. Instead, you have to work the handles the entire way through the range of the sweep.

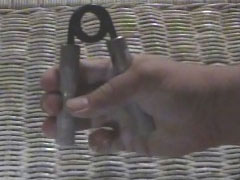
Now, even though you do not pre-close the handles, you can still place the gripper so that it is in an advantageous position. Naturally, when you attempt a no-set close, you are not just going to haphazardly drop the gripper into your hand and hope your fingers catch it in a good spot. Instead, you should situate it, so that the anchor handle is firmly and squarely set against the thumb pad and the other is favorably in contact with the fingers. This will ensure that the gripper does not slip around in your hand while closing.

No-set closes are one of my main focuses with grippers at this time, and I can see that I progress much slower with no-sets than I do when using a set.

Table No-Set
tns1.jpg
tns4.jpg
tns5.jpg
tns9.jpg
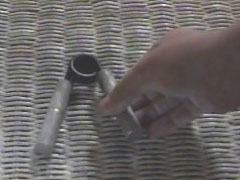
The table no-set is even more difficult, in my opinion, than the fundamental no-set gripper close. Again with this technique the close will not be assisted by the off-hand. In fact, with this technique only the squeezing hand is allowed to touch the gripper.

This technique is the one that is required for certifying under the Warren Tetting regulations. You can contact Warren Tetting for a specially made gripper which you can then certify on. To qualify, the gripper must start on a table or other hard, flat surface. The athlete must reach down with the squeezing hand, grab one handle and then wriggle the fingers into position to make the close.

To the best of my knowledge, the athlete must video tape the certification attempt and send it to Warren Tetting himself. Beyond these details, I am not sure, as I have never looked into this certification, although many Gripboard members have done so.

As far as grip contests are concerned, gripper closing techniques can't get much more pure than the Table No-set. Unless the promoter throws the gripper to the athlete and they must squeeze it upon contact, or if it is hung from a string and the athlete must try to close it in one impulsive thrust, or something along those lines; and I just don't see those challenges showing up in grip contests any time soon.

I do not recall any contests where No-sets and Table No-sets were the only approaches allowed in the gripper event. For our contest, the Global Grip Challenge, we normally specify the deepest set allowed and then if the athlete would like to use a shallower set it is perfectly acceptable. For instance, in 2005, we allowed a parallel set, but some athletes chose to use more of a Table No-set grip. In 2006, we changed to the credit card set, but we also allowed a no-set to be utilized for those who were afraid of burning up energy placing a credit card between the handles of the gripper.

Again, I think it is good to be well rounded as a Grip athlete and it will behoove you to train using all the techniques throughout the year. You might even try the toss-and-squeeze technique I mentioned above. But at some point, as the competition draws near, you should transition to a training phase where you specialize on the technique allowed at the contest itself.

Specialization. That is the theme for the next article in this series. Stay tuned. In the meantime, check out DieselCrew.com for all the latest updates. We just introduced a new product there that I know many of you would love to sink your teeth into. Thanks and STAY DIESEL.

The Home Gym 2007 - Test articles

Setting a 40kg PR
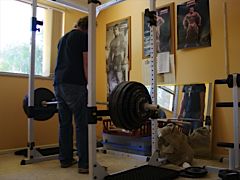
It's been a couple of years since I took a good look at my home gym. I use it all the time, of course; but I don't often stop to think of the things that should be in there. As a starting point, here's a look at the current setup.

Power rack, bar and weights

This is the core of the gym, and features heavily in my workouts. Rack pulls (it's a fairly small room, so I usually do these instead of full-range deads), pull-ups and even kettlebell swings take place in and on the rack. It's very much a major player.

Marcy bench
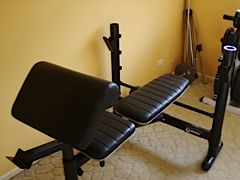
Bench (with preacher and leg curl attachments)

Although I rarely use the attachments, the basic bench comes in handy for a number of things - not least of which is the bench press. As the ceiling doesn't allow for standing overhead press work, I generally use the bench for seated versions of the same movements. Once again, this is usually done inside the rack.

Reebok Cyberrider
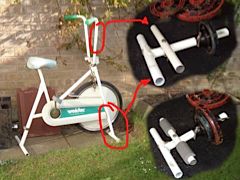
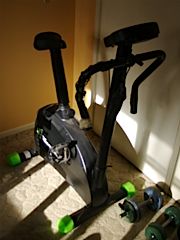
Exercise bike (stationary cycle)

Until recently, this lived in the garage and was seldom touched. It occasionally gets dusted off for warmups (although kettlebell swings are the norm).

Total Gym

I'm still impressed by what first seemed to be another piece of equipment that would soon end up in a garage sale (the infomercials don't help). As versatile as any variety of cable machine, it gets regular use as part of a warmup.

Dumbbells and kettlebellAssorted dumbbells (and kettlebell)
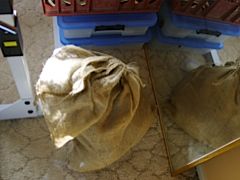
Although there are several pairs of dumbbells lying around (one of which has been fattened ready for farmers walks); they seldom get used. I suspect they should, but the barbells and kettlebell are enough for most things.

DIY SandbagSandbag

This is definitely one for outdoor training; which will resume in a few months (when the weather gets a bit warmer - it's the cold part of the year here). There are other outdoor items which seem to magically appear when things start to heat up; anvils, sledgehammers, ropes, bricks - a seemingly endless list of fun stuff.

Crabwalking - Test articles

CrabwalkingCrabwalking [streaming, 1.4mb .flv download].

Speedbag tutorialVia Napalm's Corner : if you're just starting your journey into the wonderful world of boxing, head over to Boxing for the Street and check out their video tutorials. For a taster, have a look at the speed bag instruction [streaming, 7.7mb .flv download].

Natural Bodybuilding PrinciplesNatural Bodybuilding Principles. Exactly what it says on the tin.

Cycling Baggs - Test articles

Cycling Baggs

Cycling baggs (yes, I know how to spell it). One of the many 1970s Japanese cycling ads here. Via Get Outdoors.

Forearm exerciserPat Hodgson does it again. This time it's a forearm exerciser that puts a disused bike to good use.

Click the image for a larger photo to see how it all hangs together.

SFVISBF - Test articles

SFVISBF - photo by Paul de ValeraIf you have fond memories of billy-kart (soapbox) racing - a DIY car consisting of little more than a wooden box, wheels and a steep slope; the SFVISBF is for you.

The SFVISBF (aka San Fernando Valley Illegal Soap Box Federation) is a group of guys who meet every couple of weeks to race exactly this type of home-made coffin-on-wheels. As you'll see by looking at some of the regular entrants, there's a lot of love going into this.

If you love building stuff, and you're in the area, the group's next race is this Sunday (May 13). A final word from the group :

You can get hurt or killed by doing this. There have been injuries, no deaths to this point. This is not for the weak. If you have a penchant for throwing your life into the wind and some welding skills, join us, otherwise watch the video [streaming, 20.1mb .flv download].

Looks fantastic.

DIY Stongman log - Test articles

DIY Stongman logWhen it comes to home-made gym equipment, Clay Johnson never stops. Here's a look at his latest project - a DIY Strongman log.

Here's how it was done :


I started just under 11 inch in diameter, 8 foot long log.
I cut the log in half (my neighbor wanted a throwing log). I used an old
standard bar from a garage sale (it was one of those three piece ones). I cut the standard bar to use for the handles and also for the weight loading pins.
I found the center of gravity and marked out two 8 inch by 8 inch boxes. To smooth down the bark, I ran my belt sander over the log.
Now this was the hardest part. Since I did not want to cut through the
entire log, I tried to find the easiest way to dig the boxes out. I tried an axe, reciprocating saw, and an air hammer. I finally resorted to using my small chain saw to cut out small blocks and then used a hammer and chisel to cut them out. This took awhile.
I dug down just under eight inches and then used my belt sander to dig out some more room for my hands. Although I drilled the handle holes small and had to pound them in, I used some waterproof, 2-ton epoxy to be sure down the road. I drilled the handles at half the diameter of the log. They are resting in over two inches of wood on each side. They feel very secure.
I mounted the loading pins about six inches deep and used more waterproof epoxy. I drilled the hole 7/8 of an inch so I could pound the bars in. I did have a problem with a large knot when drilling but using the bubble level on my drill I was able to keep the hole pretty much straight.
The log weighs about 125 pounds. I plan on putting some sealer on it after the epoxy sets up. I added 50 pounds on it and it held up very well!

Total cost : a couple of bucks for the log (the bar was already lying around, but they're cheap enough). Superb.

  1 2 3 4 5 6 7 8 9 10 11 12 13 14 15 16 17 18 19 20 21 22 23 24 25 26 27 28 29 30 31 32 33 34 35 36 37 38 39 40 41 42 43 44 45 46 47 48 49 50 51 52 53 54 55 56 57 58 59 60 61 62 63 64 65 66 67 68 69 70 71 72 73 74 75 76 77 78 79 80 81 82 83 84 85 86 87 88 89 90 91 92 93 94 95 96 97 98 99 100 101 102 103 104 105 106 107 108 109 110 111 112 113 114 115 116 117 118 119 120 121 122 123 124 125 126 127 128 129 130 131 132 133 134 135 136 137 138 139 140 141 142 143 144 145 146 147 148 149 150 151 152 153 154 155 156 157 158 159 160 161 162 163 164 165 166 167 168 169 170 171 172 173 174 175 176 177 178 179 180 181 182 183 184 185 186 187 188 189 190 191 192 193 194 195 196 197 198 199 200 201 202 203 204 205 206 207 208 209 210 211 212 213 214 215 216 217 218 219 220 221 222 223 224 225 226 227 228 229 230 231 232 233 234 235 236 237 238 239 240 241 242 243 244 245 246 247 248 249 250 251 252 253 254 255 256 257 258 259 260 261 262 263 264 265 266 267 268 269 270 271 272 273 274 275 276 277 278 279 280 281 282 283 284 285 286 287 288 289 290 291 292 293 294 295 296 297 298 299 300 301 302 303 304 305 306 307 308 309 310 311 312 313 314 315 316 317 318 319 320 321 322 323 324 325 326 327 328 329 330 331 332 333 334 335 336 337 338 339 340 341 342 343 344 345 346 347 348 349 350 351 352 353 354 355 356 357 358 359 360 361 362 363 364 365 366 367 368 369 370 371 372 373 374 375 376 377 378 379 380 381 382 383 384 385 386 387 388 389 390 391 392 393 394 395 396 397 398 399 400 401 402 403 404 405 406 407 408 409 410 411 412 413 414 415 416 417 418 419 420 421 422 423 424 425 426 427 428 429 430 431 432 433 434 435 436 437 438 439 440 441 442 443 444 445 446 447 448 449 450 451 452 453 454 455 456 457 458 459 460  

Pages

Powered by Movable Type 5.2.7